Recently I was fooling around with Chrome Extension development, mostly just to satisfy my curiosity about how it worked.
This article will show a basic template that illustrates one method of communication between two core components of a Chrome Extension. I don’t expect to be doing much more Extension development, but you never know, this might be useful in the future (or if some poor soul ends up reading this article).
The basic idea of this Extension is to create a ticker that starts as soon as the extension is loaded (generally on browser load). The ticker increments every 5 seconds on its own. The user can click the Extension’s icon, loading a small extension popup that shows the same ticker amount and stays in sync with the icon’s ticker. It also has a button to manually increase the ticker by 10 ticks. Completely useless (I think?), but it hopefully illustrates a couple basic Chrome Extension concepts.
Background page
Every extension has an invisible background page (maybe it’s optional). The background page is loaded as soon as the Extension is loaded into Chrome (generally when the browser first starts). This example uses both HTML and JavaScript files for the background page, but you can just use a JavaScript file.
background.html
All our background.html file does is load our JavaScript file. I mainly included it here because it contains some DOM elements, allowing us to initialize some of our JavaScript code after the DOM is loaded.
<!doctype html>
<html>
  <head>
    <script src="background.js"></script>
  </head>
  <body>
  </body>
</html>
background.js
The background JavaScript is the one that creates and controls our ticker. The code is hopefully straightforward and well commented.
One thing to note is the listener that is started. More types of requests can easily be added by adding another case. Incoming requests can have arbitrary data attached to the request object (ie, request.data is used in one of the cases).
var masterTicker = {
	tickerInterval : 1000 * 5, // seconds
	ticker : 0,
	incrementTicker: function() {
		masterTicker.ticker++;
		masterTicker.updateTicker();
	},
	addToTicker: function(amount) {
		masterTicker.ticker += amount;
		masterTicker.updateTicker();
	},
	updateTicker: function() {
		if (masterTicker.ticker==0) {
			chrome.browserAction.setBadgeText({text: ""});
		} else {
			chrome.browserAction.setBadgeText({text: "" + masterTicker.ticker});
		}
		// Send ticker amount to popup page
		chrome.extension.sendRequest({method: 'updateTicker', data: masterTicker.ticker}, function(response) {
		});
	},
};

// Start our listener
chrome.extension.onRequest.addListener(function(request, sender, sendResponse) {
	switch (request.method)
	{
	case 'addToMasterTicker':
		masterTicker.addToTicker(request.data);
		sendResponse({result: 'success'});
		break;
	case 'getMasterTicker':
		sendResponse({result: '' + masterTicker.ticker});
		break;
	}
});

// Run our script as soon as the document's DOM is ready.
document.addEventListener('DOMContentLoaded', function () {
	// Start the interval for updating the ticker
	setInterval(function(){masterTicker.incrementTicker()},masterTicker.tickerInterval);
});
Also note the masterTicker.updateTicker function. This contains the syntax for sending a request to the popup.js. When we get to popup.js, you’ll see a corresponding listener that handles that type of request.
Popup page
popup.html
This file is also very simple.
<!doctype html>
<html>
  <head>
    <title>Basic Popup</title>
    <!-- JavaScript and HTML must be in separate files. -->
	<script src="popup.js"></script>

	<!-- Local copy of javascript is needed -->
	<script src="jquery-2.1.0.min.js"></script>
  </head>
  <body>
		<div>Current Ticker: <span id="ticker-amount"></span></div>
		<button id="add-ten-to-ticker">Add 10</button>
  </body>
</html>
popup.js
The popup.js version of the ticker stores a local copy of it’s own ticker but the initial value is grabbed from background.js (on page load). After that it should always be getting the latest ticker value from background.js.
Notice the similar methods of logging a listener that handles certain request.method values and also using chrome.extension.sendRequest to initiate it’s own communication.
var localTicker = {
	currentTicker : 0,
	getTicker: function() {
		// Get official ticker amount from background page
		chrome.extension.sendRequest({method: 'getMasterTicker'}, function(response) {
			// Store ticker amount
			localTicker.currentTicker = response.result;
			// Update the DOM with the result
			localTicker.updateTicker();
		});
	},
	addToTicker: function(amount) {
		// Request X amount to be added to ticker
		chrome.extension.sendRequest({method: 'addToMasterTicker', data:amount}, function(response) {
			// Get new official ticker amount
			localTicker.getTicker();
		});
	},
	updateTicker: function() {
		// Update the DOM to show the ticker value
		$( "#ticker-amount" ).text("" + localTicker.currentTicker);
	},
};

// Add listener to receive messages from background page
chrome.extension.onRequest.addListener(function(request, sender, sendResponse) {
	switch (request.method)
	{
	case 'updateTicker':
		localTicker.currentTicker = request.data;
		localTicker.updateTicker();
		sendResponse({result: 'success'});
		break;
	}
});

// Run our script as soon as the document's DOM is ready.
document.addEventListener('DOMContentLoaded', function () {
	// Grab current ticker amount from background
	localTicker.getTicker();

	// Attach onclick event to button
	$("#add-ten-to-ticker").click( function() {
		localTicker.addToTicker(10);
	});
});
That’s really the meat and potatoes of showing this method of communication between background.js and popup.js.
The rest of the Extension
I’ll briefly go through the remaining parts of the extension and how to get it up and running.
manifest.json
Every Chrome Extension needs a manifest.json file. Here is what our’s looks like.
{
  "manifest_version": 2,

  "name": "Basic Ticker Extension",
  "description": "Demonstrates basic communication between background.js and popup.js",
  "version": "1.0",

  "browser_action": {
    "default_icon": "icon.png",
    "default_popup": "popup.html"
  },
  "background" : {"page": "background.html"}
}
Other files
You need 2 more files:
- icon.png: A 19 x 19 image file
- Local version of any JavaScript files you need (ie, jQuery)
Full file list
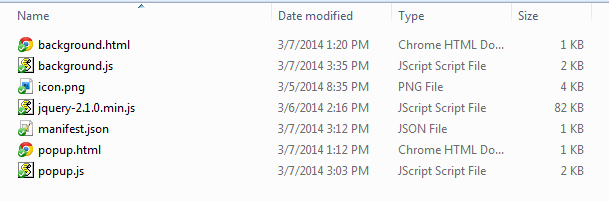
Loading and testing Extension
Getting the Extension working in your browser is very easy.
- Go to your Extensions console (via upper right button or chrome://extensions/ in your address box.
- Make sure Developer mode is turned on.
- Click Load unpacked extension… near the top of the page.
- Select the folder on your hard drive containing all of the Extension files
Now you should see the icon of your Extension in the upper right and a new entry in the Extensions list.